Showing posts with label recipe. Show all posts

Wednesday, September 5, 2012

My first Singaporean cookies


I made my first batch of cookies in Singapore! And yes, I will probably continue to get excited the first time I do every very normal thing, only this time in Singapore. Anyway, the cookies were really just to have a snack for Andrew to take to work; while we were in the hotel, we bought granola bars that he ate for work-day snacks. They were good but I never like how very sweet store-bought granola bars are, so I prefer making my own for snacks.

Except then I made batch of granola on Sunday (first batch of granola in Singapore!) and used most of my newly bought (first big shopping trip for groceries in Singapore!) granola-bar-type ingredients for the actual granola. But I did have an interesting new sugar (black sugar, which seems way more exciting than brown sugar although it is in fact a similar colour to treacle sugar, muscovado sugar, and other dark brown sugars), an interesting new flour (very fine, pale yellow-ish whole-wheat flour; I’m not sure if it actually is whole-wheat), and some baking staples like eggs and baking soda (and here is another set of parentheses, just so I can say I have managed to fit five sets into one two-sentence paragraph).


So I made up some sugar-laden cookies, meaning I could just as well have bought more sugary granola bars for work snacks. But I’m glad I didn’t because, much to my surprise, the cookies made with all the new-to-me ingredients, eyeballed measurements and some unusual elements turned out to be some pretty decent peanut cookies. I’m glad I paid attention when I made them; I will definitely make them again, although this time for a treat instead of a snack.

For now, though, off to go get some more granola bar ingredients. After I sort out a little kitchen disaster I just had (first kitchen disaster in Singapore!)


Whole-wheat olive oil peanut cookies

Makes about 18

I’ve listed alternative options for things like the fine whole-wheat flour and black sugar, which should all work perfectly well. You could also substitute the peanut butter with any other nut butter, and the olive oil with vegetable oil, but then you'd have to give the cookies a new name. Add-ins could work well – chocolate chips, dried fruit, other nuts – although I liked the simplicity.

1 c fine whole-wheat flour (or use cake flour)
¼ tsp baking soda
½ tsp salt
½ c toasted sweet peanuts (another new-to-me ingredient; alternatively, use raw peanuts or very lightly salted roasted peanuts)
¼ c olive oil
¼ c peanut butter
½ c black sugar (or any other dark, moist sugar such as treacle, muscovado, demerara, etc.)
¼ c caster sugar
1 egg
1 tsp vanilla extract

Preheat the oven to 175 C and grease a cookie sheet with a little olive oil.

In a medium bowl, sift and mix flour, baking soda and salt. Make a well in the centre and set aside.

In a small bowl, whisk olive oil, peanut butter, sugars, egg and vanilla extract until well blended and frothy. Pour into the flour mixture and mix with a wooden spoon until the mixture comes together into a firm dough.

Break off slightly-larger-than-walnut-sized chunks of dough and roll them into balls. Place the balls spaced about three centimetres apart on the cookie sheet and press each ball to flatten into a disk. 

Slide the cookies into the oven and bake for 8 to 12 minutes - less if you want softer cookies, more if you'd prefer them a little crisp. Remove from the oven and cool for 5 minutes before lifting onto a wire rack to cool to room temperature.

These cookies kept well in a sealed container for one and a half days and then they were gone, so I have no further information on how long they might keep.

Monday, September 3, 2012

And now: eating AND cooking in Singapore!


Living in a hotel and being forced to eat out every night is not really a hardship, especially not when you’re doing so in Singapore where there is sure to be yet another hawker centre, food court, cafe or restaurant around every corner, all of them offering a bewildering array of dishes to choose from. But, as evidenced by this site and my former life as a caterer and chef, I like to cook. What with the crazy few days before leaving South Africa and nearly three weeks in a hotel, I hadn’t cooked a thing for about a month. The closest I came was making peanut butter and apricot jam sandwiches on the floor in our hotel room for Andrew to take to work. Peanut butter and jam sandwiches are delicious, but a three-year-old can make them with eyes closed (maybe; perhaps I should get my sister-in-law to do an experiment with my three-year-old niece). Which is to say, my daily sandwich-making hardly provided me with any sense of culinary achievement.

The walk home from the shops, along a canal


However! Buying random, unfamiliar vegetables, packages, bottles and jarred things and trying to figure out what to do with them in order to end up with an edible dinner – now that does provide me with a sense of achievement, even more so if the dinner is not just edible but actually good. We moved into our flat – called a condo here – over the weekend, and before we’d even unpacked anything, we’d been to our local grocery shop and stocked up on some familiar staples, and a whole lot of other things that seemed like they might be good and weren’t too expensive (in case they weren’t good).

Inaugural dinner, much more average than the word "inaugural" implies


After weeks of eating out we both just wanted vegetables, so I roasted a big tray, tossed it in a spicy peanut sauce (that possibly contained cuttlefish; I think I accidentally bought cuttlefish-laced chilli sauce but didn’t tell Andrew and he didn’t seem to mind) and called it dinner. It was edible, but not great; it appears Chinese green carrots and white radishes are perhaps not best when roasted (although, please do correct me if I'm wrong).

Dinner number two - much better!


But I was not discouraged, and dinner number two fared much, much better. We managed to find proper whole-wheat spaghetti, to my delight, and tossed the hot, cooked spaghetti with sautéed shiitake mushrooms, enoki mushrooms, Chinese spinach, crushed garlic, lime juice, soy sauce and olive oil. I topped the pasta with enormous toasted pumpkin seeds, and voila – dinner. So good. The kind of thing I would’ve made back in Cape Town, but using lots of local ingredients (that is, as local as things can be when not much is grown on this small island).

Biggest pumpkin seeds I've ever seen


Mushroom spaghetti with spinach and lime
Serves 3 or 4

Most of the ingredients here can be easily substituted. For example, you could use normal spaghetti, or a different shape pasta; use sunflower seeds instead of pumpkin; replace the mushrooms with any other variety of mushrooms you can find; use English spinach or rocket instead of Chinese spinach; and while the lime juice is lovely, lemon will also work. Reduce the garlic if you’re not used to too much.

150g shiitake mushrooms
180g enoki mushrooms
2 cloves garlic, crushed
Large bunch of Chinese spinach
Juice of 3 tiny limes, or 1 average lime
75g pumpkin seeds
4 tbsp olive oil
Salt
250g whole-wheat pasta
4 tbsp soy sauce
Pepper

First do your prep: slice the mushrooms, crush the garlic, cut the spinach up into bite-size pieces, squeeze the lemon juice and toast the pumpkin seeds in a hot oven till golden – watch them, they burn quickly.

Once your prep is done, place a large pot filled three-quarters of the way up with water, a tablespoon of olive oil and a teaspoon of salt over high heat to bring to the boil.

Meanwhile, place a large, heavy-bottomed pan over high heat, pour about a tablespoon of olive oil in the pan, and add the shiitake mushrooms. Sauté the mushrooms until dark golden; add the enoki mushrooms and sauté for a few more minutes (skip this step if only using larger mushrooms; the enoki mushrooms should be cooked much less since they’re so small and frail). Remove the pan from the heat and lower the heat to medium.

Your pasta water should be boiling by now – add the spaghetti.

Return the mushroom pan to the heat, adding the spinach and garlic. Sauté for a few minutes until the spinach has wilted. Scoop a few spoonfuls of pasta water into the pan and add the lime juice, soy sauce, another two tablespoons of olive oil and plenty of freshly ground black pepper. Give it a good stir and turn the heat as low as it can go.

When the pasta is cooked, drain thoroughly and add to the mushroom pan. Turn the heat up to high and toss the pasta quickly until most of the liquid has evaporated. Remove from the heat and taste – you might need to add a bit of soy sauce or salt, or some more lime juice or pepper. If you do add more liquid, return it to the heat for another minute or two; otherwise, remove from the heat and scrape into a serving dish.

Top with the toasted pumpkin seeds and serve.

Wednesday, August 15, 2012

Chocolate orange cake, and a bit of nostalgia

We are in Singapore. I have eaten many notable things, despite only being here for just over 24 hours, and I have many thoughts. But first, some nostalgic pictures from our last week in South Africa, spent both in Cape Town and in Pretoria.

Mountains!

One of the views on one of our favourite
running routes in Cape Town

We ate lots of delicious food in the last week, including this
springbok ravioli dish at Bizerca Bistro

And we drank lots of wine,
like this pinot noir flight at French Toast

Cake and wine at the end of a family braai

That last photo is of a chocolate-orange cake I made for dessert at a family braai; chocolate with orange is one of my mom's favourite flavour combinations. I winged it, being at my mom’s house without recipes and my usual implements, but it turned out well enough that I think it should be made again.

Chocolate orange cake
Makes one large, high cake, or two layers for a layer cake
I had only one cake pan, so I baked the cake as a single layer, sliced it in half and filled it with marmalade. Two thinner layers would probably be easier, although you’d have to reduce the baking time.
When the cake was baked, I decided against covering it with frosting or icing of any kind. But I was afraid it would be dry without a topping, so I both soaked it in a flavoured sugar syrup and filled it with marmalade. It was delicious and I wouldn’t make it without the syrup, although you could add a chocolate frosting or ganache topping to make it richer and fancier if you like.

Batter:
½ c butter
1 c golden sugar
Zest and juice of 1 large orange
3 eggs
1 ¼ c flour
½ c cocoa powder
1 tsp salt
1 ½ tsp baking soda
1 tbsp balsamic vinegar
¼ c milk, plus more if needed

Syrup:
Juice of 1 large orange, plus a few strips of orange peel
¾ c water
½ c sugar
Preheat the oven to 165 C. Butter a large cake pan and line with baking paper, then butter again and dust with cocoa powder. Set aside.
In a large bowl, cream the butter, sugar and orange zest until light and fluffy. Add the eggs one by one, beating well after each addition; the mixture might start to split just a little, which is fine.
Sift the flour, cocoa powder, salt and baking soda into the butter mixture and add the orange juice, balsamic vinegar and milk. Stir until just combined. If the batter drops off the mixing spoon easily at this point, you’re done; if it seems thicker, add a bit more milk and mix again.
Scrape the batter into the prepared pan and bake for  approximately 45 minutes, or until a toothpick inserted into the centre comes out clean.
While the cake bakes, place all of the syrup ingredients in a small pot and bring to the boil. Boil for about five minutes and then remove from the heat. Remove the orange peel.
When the cake is baked and has cooled for five minutes, poke it all over with a sharp knife or a fork. Make sure you get to most of the cake’s surface. Pour the syrup over the cake, distributing it as evenly as you can.
Cool the cake further to room temperature, then invert onto a plate and fill and decorate as desired. Like I said, I just cut it in half, spread a lot of marmalade in between the two layers, and topped the cake with sliced kumquats and strawberries.

Monday, August 6, 2012

Interruption for pecan-cinnamon coffee cake


Coffee cake seems to be an American thing, for me another relic from my childhood spent amongst Americans. Because by coffee cake I don’t mean coffee-flavoured cake, I mean a general group of cakes originally meant to be eaten along with a cup of coffee. Of course, any cake can be eaten along with a cup of coffee, so I’m not sure why there is a specific kind of cake that’s given this definition. Regardless, as far as my experience goes, coffee cakes are sometimes but not always yeasted, often contain nuts and are often topped with a buttery, crumbly streusel topping – no frosting or icing. They tend to be sturdy, moist cakes, flavoured with vanilla and maybe some spices, but nothing too overpowering. They are, in fact, very good to have with a cup of coffee, and so I decided to bake one for afternoon coffee with a friend (fine, we had tea. Hopefully there are no coffee cake police).


I had a bag of good fresh pecan nuts that I had to use before we left, so I did some searching for pecan nut coffee cakes on the interwebs. There were many, but here’s something that bothered me: this kind of cake is not supposed to be very sweet, yet most of the recipes had many, many cups of sugar, and some even had glazes topping the streusel. Just reading the recipes made my teeth ache. So I used a few different recipes as pointers and cut and pasted and edited until I ended up with my own coffee cake. Sweet and buttery, but not so much so that you wouldn’t be able to have a piece for breakfast. Of course along with the obligatory coffee.


Pecan-cinnamon coffee cake
Makes one large sheet-pan cake

You can easily play with this recipe, using different nuts or spices, adding raisins, or citrus juice and zest.

Streusel:
1 ¾ c flour
½ c treacle sugar
½ tsp cinnamon
1 tsp salt
½ c butter, cold and cubed
½ toasted, chopped pecan nuts

Middle layer:
¼ c treacle sugar
¼ tsp cinnamon
1 c toasted, chopped pecan nuts

Batter:
½ c butter
2 c flour
1 ¼ tsp baking powder
½ tsp baking soda
½ tsp salt
¾ c sugar
2 eggs
1 ½ tsp vanilla
¾ c sour cream or full fat yoghurt
½ c milk
Preheat the oven to 170 C. Butter a large casserole dish or sheet pan and dust with flour, shaking out excess flour. Set aside.

For the streusel, combine all the streusel ingredients in a bowls and rub together with your fingertips until the mixture resembles coarse breadcrumbs. Set aside.

For the middle layer, combine all middle layer ingredients in a small bowl and toss together. Set aside.
In a large mixing bowl, cream the remaining butter and sugar until light. Add the eggs one by one, beating well after each addition. Sift the flour, baking powder, baking soda and salt into the bowl, add the sour cream (or yoghurt), milk and vanilla extract, and beat until well combined with no lumps.

Spoon half of the batter into the prepared pan and smooth with the back of a spoon. Sprinkle the middle layer mixture over the batter evenly, then top with the remaining batter and smooth over to cover completely. Finally top evenly with the streusel mixture.

Slide into the hot oven and bake for 40 – 50 minutes, until the topping is golden and a toothpick inserted into the centre comes out clean.

Cool at least ten minutes before cutting into squares.

Wednesday, February 15, 2012

Citrusy rhubarb-polenta cake


When my grandmother died in September last year, she was 87. She was one of the happiest, most content people I’ve ever known, despite the fact that in the last twenty-odd years of her life her husband died, and six of her sisters, and her son-in-law, and so many of her friends. That’s just what happens when you start to go beyond a certain age, I guess. But my point is, as the cliché goes, she’d had a long and full and happy life, so there is no call to be sad for her on that front.

But of course I’m sad for myself, especially so now that my wedding day is drawing near and she won’t be there like I’d always dreamed. I prefer not to think about it too much; when I do, I inevitably start thinking about my dad who also won’t be there.


Sometimes the thoughts sneak up on you though, you can’t see them coming and avoid them. Just now I was zesting a mineola and two limes for a cake for book club tonight, idly wondering if I should make citrusy iced tea with the insides of the zested fruit. That made me think of homemade lemonade which I haven’t had for ages, and bam – my grandmother’s homemade lemonade. A thick sweet lemony syrup with lots of little bits of zest that we mixed with water, usually the fizzy water made with the ancient Soda Stream. I think that’s the last homemade lemonade I drank. It must have been years ago, she hadn’t made it for a long time, and now I wonder where the recipe is, if one of us still has it and if I could maybe make some.

And then of course within seconds, leaping and bounding on from lemonade, I’m thinking about the wedding and the outfit my grandmother had already bought for it and what my dad would have thought of it all. The lime and mineola zest lies forgotten on the kitchen counter.

The cake does get made eventually, zest and all. That’s after I remember that I was lucky enough to have had such a grandmother for so long, and that she was so happy for me and Andrew. After I think that my dad would have thought well of it all. Especially since so many times, little things about Andrew remind me of him, and I know how lucky I am that I’m marrying him. What a happy day it will be.


Citrusy rhubarb polenta cake
Serves about 16

I like the gritty texture of polenta cakes, and the fact that most of them aren’t too sweet. I wanted a loaf cake but had quite a bit of batter and rhubarb left over after filling my standard-sized loaf pan, so I made four little loaves as well. In a standard round cake tin you’ll end up with just one cake. The rhubarb is very tangy, so I balanced it with the sweet citrusy drizzle for the bigger loaf cake. I left the little loaves plain, though, so that I can justify eating them for breakfast.

Also, I followed all the rhubarb cooking rules and cooked mine in a stainless steel pot – not aluminium, copper or iron, which reacts with rhubarb and makes it brown. I still ended up with brownish rhubarb. No idea why, but it tasted good.

1 large-ish bunch rhubarb stalks
½ cup sugar
1 orange (or mineola, which is what I could find)
2 limes
1 ½ cups cake flour
¾ cup fine polenta
2 tsp baking powder
1 tsp salt
4 large eggs
1 cup sugar
¾ cup olive oil
1 ½ cups sifted icing sugar

Preheat the oven to 160 C. Butter your cake tin, line with baking parchment, butter again, and dust with flour (you probably don’t have to do all of this, but I was convinced the cake would stick otherwise). Set up a stand mixer with a whisk attachment (or alternatively, you can use a hand-whisk and large bowl).


Wash the rhubarb thoroughly and chop it into inch-thick pieces. Place it in a ceramic or stainless steel pot along with the ½ cup of sugar, and place it over medium heat. No need to add any water – as it warms, the rhubarb will release its own juices and dissolve the sugar, and cook down into an apple-sauce-like mixture. Stir it every now and then as it cooks, about 20 minutes.

Meanwhile, zest the orange and limes, and squeeze their juices into a small bowl. When the rhubarb has cooked down, add about half of the citrus juice and stir, then remove from the heat.

Whisk the flour, polenta, baking powder and salt together in a bowl until well-mixed. Add the eggs and 1 cup sugar to the stand mixer bowl and whisk on medium-high speed until the mixture is light and thick – this should take about 4 minutes. By hand it unfortunately takes more like 10 minutes. Add the orange and lime zest, and whisk again to mix thoroughly.

Add the flour mixture and olive oil to the whisked egg-sugar mixture by turn, whisking all the while – a third of the flour mixture, then half the oil, again a third of the flour mixture, the other half of the oil, and end with the final third of the flour mixture.

Now you have a choice: either spoon the rhubarb mixture onto the bottom of the cake pan(s) and cover with batter, or pour the batter into the pan(s) and drop spoonfuls of the rhubarb into the batter. In the first method, you’ll end up with an upside-down cake, and in the second, the rhubarb will peek out but will mostly be baked into the cake.

Bake for about 30 to 40 minutes (little loaves will take 15 to 20 minutes, a regular loaf about 30 minutes, and a big round cake will take 35 to 40 minutes), turning the cake 180 degrees halfway through the baking time so it bakes evenly. While it bakes, you can whisk the remaining citrus juice with the icing sugar to make a citrusy glaze.


The cake is done when a knife or toothpick inserted into it comes out clean. Remove the cake from the oven and cool in the pan for five minutes before either turning out (for the upside-down cake) or lifting out (for the baked-in-rhubarb version). Drizzle with the glaze, if you like, or leave plain for a slightly more virtuous cake.


Tuesday, November 15, 2011

Seared sweet chili steak salad


I used to be a vegetarian, and while I do now eat meat, my diet still consists mostly of vegetarian food. Until recently, that is. For some unknown reason I've been craving red meat in the past few weeks. It's strange, but I generally go with what my body seems to need. More red meat it is, then.

This salad is a recent attempt to feed the new red meat craving. It's so simple that I honestly didn't expect much of the result, but it surprised me by being utterly delicious. And if you're interested in this kind of thing, it's also very high in protein, high in fibre, and low in fat.


Seared sweet chili steak salad
Makes enough for 2

100g good quality steak (preferably fillet), cut into strips
3 tbsp plus 1 tbsp sweet chili sauce
juice of 1 lemon, halved
2 tbsp canola oil, halved
1/2 of a small head of broccoli, cut into florets
1/2 cup thinly sliced red cabbage
1/2 cup cooked quinoa (or other grain such as couscous or bulgur wheat, if you prefer)
big handful wild rocket (baby spinach would also be good)
salt

Toss the steak strips with 3 tablespoons of sweet chili sauce and half of the lemon juice and set aside.

Heat 1 tablespoon of oil in a medium sized pan over high heat, till it starts to smoke slightly. Add the broccoli florets and toss around the pan for a few minutes, until the florets are cahrred here and there but still bright and crunchy. Remove the broccoli from the pan but keep the pan on the heat.

Add the steak strips and all the chili-lemon juices to the pan and stir fry for abot five minutes, until the strips are just cooked through and the juices have caramelized. Be careful not to overcook as that would make the steak tough and chewy.

In a medium bowl, toss together the broccoli, steak strips, and all remaining ingredients, including the remaining sweet chili sauce, lemon juice and oil. Toss and taste, adding as much salt as needed.

Wednesday, September 7, 2011

Friday night pizzas

Most week nights, I like to make sure that we have a home-cooked meal for dinner. Nothing fancy or traditional, like roast chicken or lasagne. Usually wraps, a grain salad, pasta, something simple and hopefully reasonably good for us. The only drawback is that I almost always get too many ingredients for whatever I plan to make during the week, and then often also make for too much food for dinner. By Friday, our fridge is full of bits and pieces of leftover ingredients and dishes. While we eat some of the bits and pieces over the weekend, some of it always goes off before we get to it and has to be tossed.

Now, I hate throwing away food – in this and many other respects it seems I’m becoming more and more like my dad. I needed a solution for the bits and pieces, and so – Friday night pizzas.

I love gourmet pizzas with carefully coordinated toppings, and I do make that kind sometimes. But pizza was originally invented as a way to make a few scraps of food go a long way, so now, that’s what I do when our Friday bits and pieces seem to lend themselves to becoming pizza toppings. All I need to do is make pizza dough, assemble and bake.

Here is this past Friday’s pizza. The base was covered in tomato-red pepper sauce, red pepper slices and caramelised onions. Andrew’s side got Black Forest ham and camembert, and my side got smoked salmon and brie. And to top, avocado for both sides.


Pizza dough
Makes enough dough for two large pizzas – I make one large pizza for two of us and freeze the other half of the dough to use later.

3 cups bread flour
7g instant yeast
2 tsp salt
4 tsp sugar
1 tbsp olive oil
½ - 1 cup warm water

Place all the ingredients except the water in either the bowl of a stand mixer, or a mixing bowl. Then start adding the warm water slowly, while at the same time stirring slowly, either with a dough hook attachment on the stand mixer, or with a wooden spoon. Keep adding water and stirring until the dough starts to come together into a sticky ball.

Now, if you’re using a stand mixer, turn the speed up to high for about 3 to 5 minutes, until the dough is soft and smooth and just a bit sticky still. If you’re making the dough by hand, turn it out onto a floured surface and knead for about 10 minutes, also until the dough is soft, smooth and retains just a bit of stickiness.
Now place the dough in a large oiled bowl, turning it once to cover the dough in oil. Cover the bowl with a dishcloth and place the dough in a warm spot. Leave the dough to rise for about 30 minutes, until doubled in size.

While the dough rises, preheat the oven to its hottest setting (this is 240 C for my oven) and if necessary, prepare your toppings.

When the dough has doubled in size, give it a quick knead in the bowl, and you’re ready to assemble your pizzas. Here’s where you can get fancy with pizza stones, pizza peels, and more, but if I want a perfect restaurant-style pizza, I’ll go to a pizza restaurant. When I’m making homemade pizza, I keep it simple. Brush a cookie sheet with olive oil, cut the dough in half, and place one half on the oiled cookie sheet. Gently spread and push the dough to cover the whole cookie sheet, making raised rims all along the edges. This usually takes a bit of time since the oiled cookie sheet makes it a bit difficult for the dough to stick once stretched, but you’ll get there eventually.

Then just add whatever spreads, sauces, and toppings you like. Slide into the hot oven and bake for 10 to 20 minutes – the time depends very much on how hot your oven can go, and how crispy you like your pizza. I like very crispy pizza with dark brown edges, so sometimes I bake mine for as much as 25 minutes.

Wednesday, August 31, 2011

Danish recipe


Finally, the promised Danish recipe. The rolling out process is a little difficult to describe, so I’ve taken step-by-step photos to illustrate. Because of the photos and an extra recipe for the filling, this post is very long, making it seem complicated. It’s really not complicated at all, though it does take a long time from start to finish. But since much of the time is spent waiting for the dough to rest, you can get on with other things while you’re making the dough and assembling the danishes. And I promise, the feelings of satisfaction and accomplishment when you finally pull a tray of golden steaming danishes out of the oven, along with the 100% fresh, soft-crunchy pastries themselves, is ample reward for the time and effort involved.

Making the dough

Danish dough
Makes enough dough for 12 large pastries. I made 10 enormous ones because I’m greedy.
I’ve written this recipe to be made using a stand mixer. You can definitely mix and knead the dough by hand, it will just take a bit more time and effort.

7g instant yeast
½ cup milk, warmed to body temperature
¾ cup water, warmed to body temperature, plus more if needed
1 egg yolk
4 cups cake flour
¼ cup sugar
1 tsp salt
½ tsp ground cardamom (optional)
225g cold butter
More flour, for dusting and rolling

Place the yeast, water and milk in the bowl of a stand mixer fitted with a dough hook, and mix on medium speed until the yeast is dissolved. Add the egg yolk and mix to incorporate.

Sift the flour, sugar, salt and cardamom together and add to the yeast mixture. Mix on medium until just combined. I find that I usually need to add a little more water at this point to make the dough come together into a ball – just a little though, no more than ¼ cup. Once the dough has come together and formed a ball, increase the speed to high and leave for two to five minutes. The dough should be perfectly soft and smooth, with very little stickiness. Remove from the bowl, cover in clingwrap and refrigerate for fifteen minutes.

While the dough rests, dust a cool kitchen surface with flour and place the butter on the surface. Dust the butter with flour, too. Like so:


Use a rolling pin to beat the butter flat, and roll it out into a square. Squish together any bits of butter that break off.


Now push the butter aside and dust the surface with flour again. Remove the dough from the fridge and place it on the floured surface, dusting the dough with flour too.


Roll out to at least twice the size of the square of butter.

Dust the flour off the dough with a brush once it's rolled out

Place the butter in the centre of the rolled out dough.


Fold the dough over the butter like this:


Press the folded edges down to seal them, and then roll the dough out.


Now fold the dough like this:

Make sure to dust the flour off each folded bit as you fold


As you can see, some of the butter broke through my dough in the bottom right corner. This isn’t meant to happen, but as long as all the butter doesn’t break through and melt everywhere, it won’t affect your final product at all. Wrap the folded dough in clingwrap and refrigerate for 25 minutes.

Now, you repeat the rolling, folding and resting process described above three more times. So that means, you’re going to remove the dough from the fridge, roll it, and fold it; and again; and again. Every time you remove the dough from the fridge to roll again, make sure your surface is well-dusted with flour, and also – this is important! – lay the dough down before rolling so that the “open” seam side is facing your body. Like this:


And...
Roll, fold, rest.
Roll, fold, rest.
Roll, fold, rest.

And that’s it! Your dough is now ready to be rolled out one final time and turned into danishes.

Making the fillings

Now, the fillings. I made two kinds of danishes – custard and sour cherry, and chocolate. For the chocolate danish, I just used squares of plain dark chocolate. It was obviously good – when is buttery pastry combined with chocolate not going to be good? – but next time I’d use a thick, pipe-able ganache instead.

For the custard and sour cherry danishes, I cheated a little. I made my own custard, but bought jarred sour cherries in syrup and just thickened the syrup with a little cornstarch. You could use any fresh, frozen, or jarred berries or fruit to make a filling, or just use fresh berries. In my opinion, slightly tart berries or fruit work best (like the sour cherries used here, or cranberries, Cape gooseberries, plums, and so on).

Custard filling
Otherwise known as crème patisserie or pastry cream. Recipe makes about two cups.

1 ½ c milk
1 tsp vanilla extract
4 egg yolks
1/3 cup sugar
1/3 cup flour
1 tsp salt

Place the milk and vanilla extract in a medium pot over medium heat and warm to body temperature.

Meanwhile, in a medium-sized bowl, whish the egg yolks and sugar to combine, then add the flour and salt and whisk till smooth.

Add the warmed milk to the egg yolk mixture little by little, whisking all the while until all the milk has been added and the mixture is completely smooth. Return the mixture to the pot, place over medium heat. Stir the mixture constantly with a wire whisk as it warms up and thickens. When the custard becomes thick enough to be piped, continue whisking for another minute or two to make sure the raw flour taste has cooked out completely.

Remove from heat and cool, covered.

Assembling the danishes:


There are many different fillings you could use, as well as many different shapes you could fold your dough into. As mentioned, I chose a custard and sour cherry filling, and a dark chocolate filling, and demonstrate four different shapes.

First, roll the dough out to a thickness of 2mm to 5mm, and cut into equally sized squares or rectangles. The thickness of your dough and the size of your squares/rectangles depends on how many danishes you want to make, and how big or small they're going to be.


Trim the dough's edges with a sharp knife. This is important - sharply cut trimmed edges mean that the pastry will puff well in the oven.


Cut into squares or rectangles.


Now you can shape and fill.

First shape – my favourite, the pinwheel:


Then you pipe some custard onto the centre of the square, top the custard with some cherries and syrup, and fold like this:


Second shape – no idea what it’s called, let me know if you do:


Again, pipe custard onto the centre and top with cherries, and fold:

It looks messy (because it is messy) but it bakes up pretty

Third shape – again, no idea what the name is for this shape - you pipe the custard and place the cherries onto the uncut dough, and fold like this:

This one didn't hold up well in the oven, so not my favourite shape

Fourth shape – not really a shape at all, just an easy way out - roll the already cut dough a little more to make a longer rectangle:


And fold over, sealing the edges with a little beaten egg:


Now you're ready for the final step, baking.

Baking the danishes:

1 egg, beaten with some water
¼ cup smooth apricot jam
¼ cup water

Once you’ve filled and shaped the danishes, they have to rise for 30 to 40 minutes. Place the pastries on a baking slide and leave them in a warm, but not hot, place.

While they rise, preheat the oven to 200 C. Place the apricot jam and water in a small pot and bring to the boil, whisking to combine. Let the mixture boil for a few minutes to thicken a little. Remove from the heat.

The pastries are fully risen when the dough looks soft and puffy. Brush them with the egg and water mixture, and slide them into the hot oven. After ten minutes, turn the heat down to 175 C and bake for a further 8 – 10 minutes (check them after 8 minutes, and if they’re not deeply golden, leave them for a couple more minutes).

Remove from the oven and slide onto a wire cooling rack. Once the danishes have cooled for about ten minutes, brush them with the jam mixture – brush the pastry as well as the filling, so that it all looks shiny.
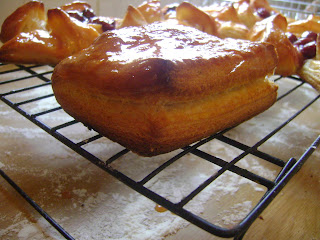
Giant danishes

And you’re done!

Eat me